One of the big projects i’ve been planning for a while is to put in a new water maker.
Part of the design for the large lithium battery bank & inverter we installed was to have enough power to run a larger water maker. We originally had a SPLASH30 from Ecosystems. It was a very good unit, but as full-time live-aboard, we found that 30 litres per hour was not enough production. The water maker was running for ages to keep up with our demands, so I wanted something with more output. Rather than buy an expensive unit off the shelf, I decided to build something myself. The downside of this is that it wouldn’t be as energy efficent as a production unit with “energy recovery”, but it should be a fraction of the cost. It also meant I could design something to fit into the available space in Nautilus.
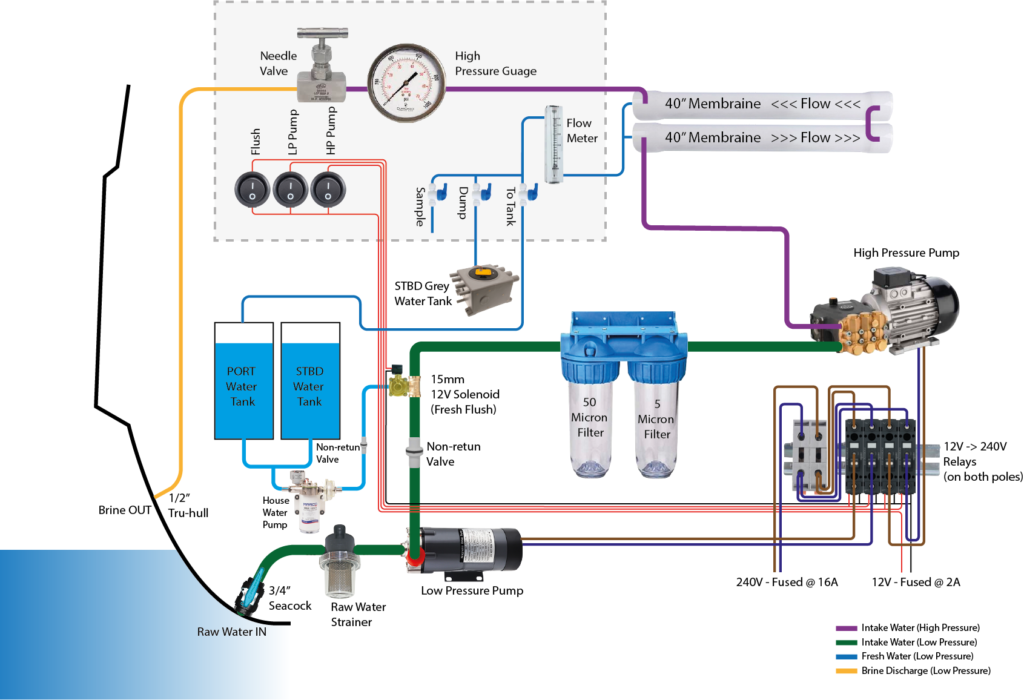
My design is pretty simple – i’ve followed the same basic model most people use and that you can buy from the likes of SeaWaterPro or SailFish Marine. For me one of the major considerations was to design it to elegantly fit into the available space on the Nautitech 40.
This was pretty simple, I reused the seacock from the STB WC as we stopped using it when we switched that head over to using fresh water. I added in a Raw Water strainer to take out any rouge weed and ran that through to the low pressure pump. As you can see, all the connections have double jubilee clips on them (which is supposed to be best practice, just incase one fails).
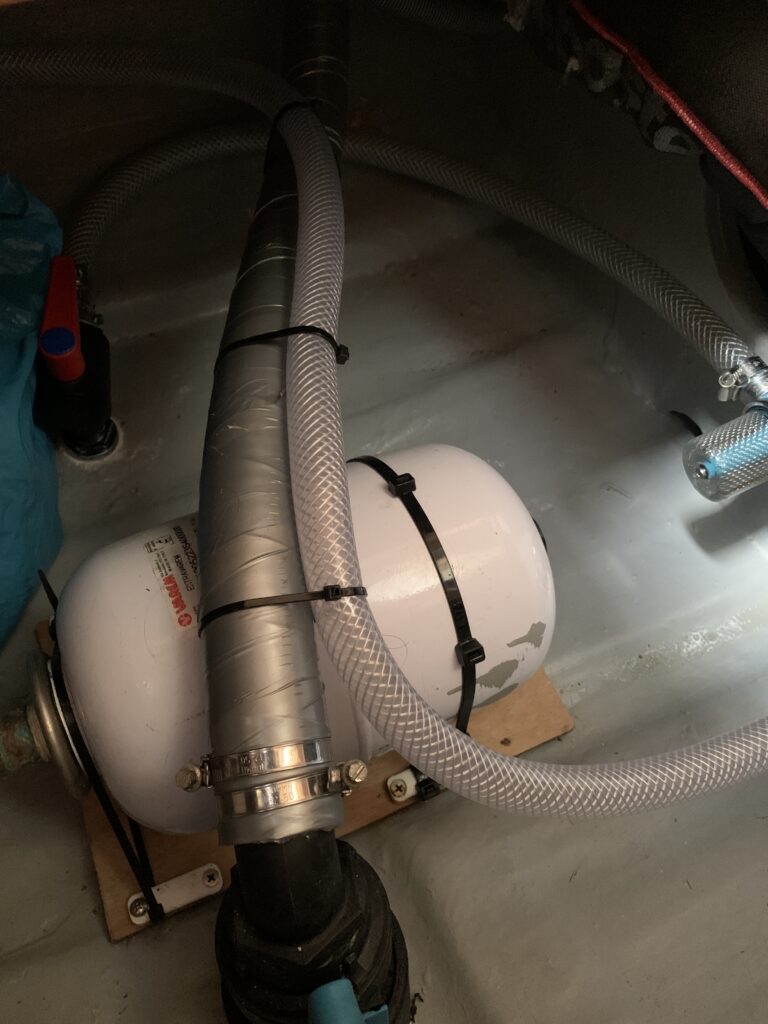
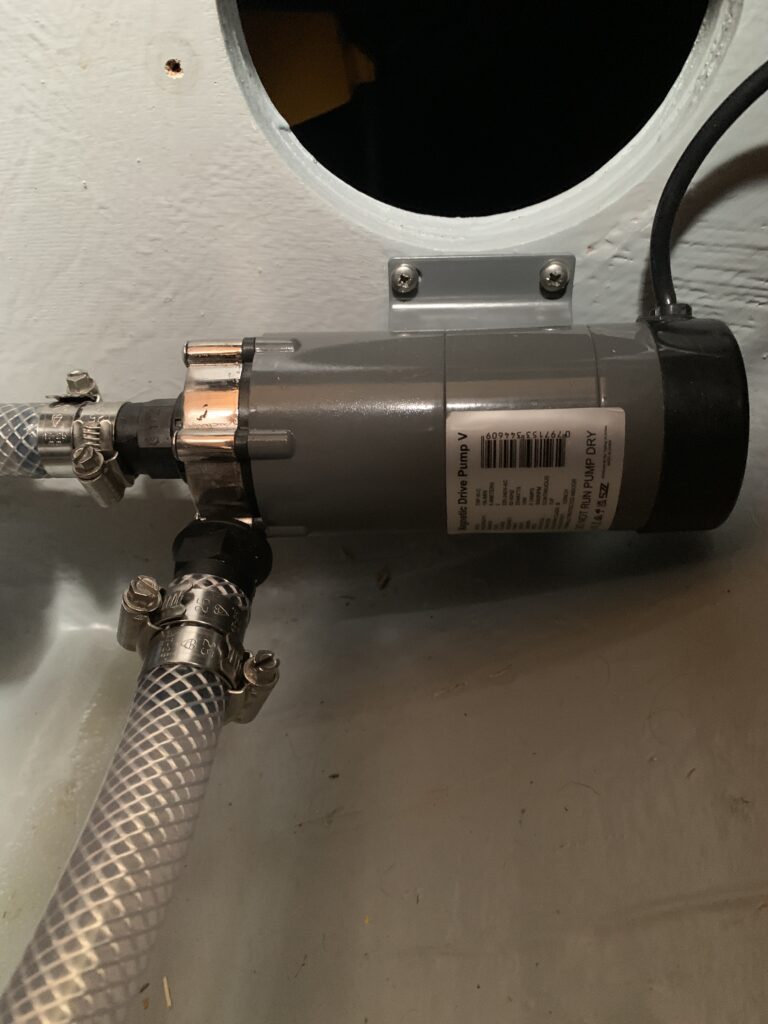
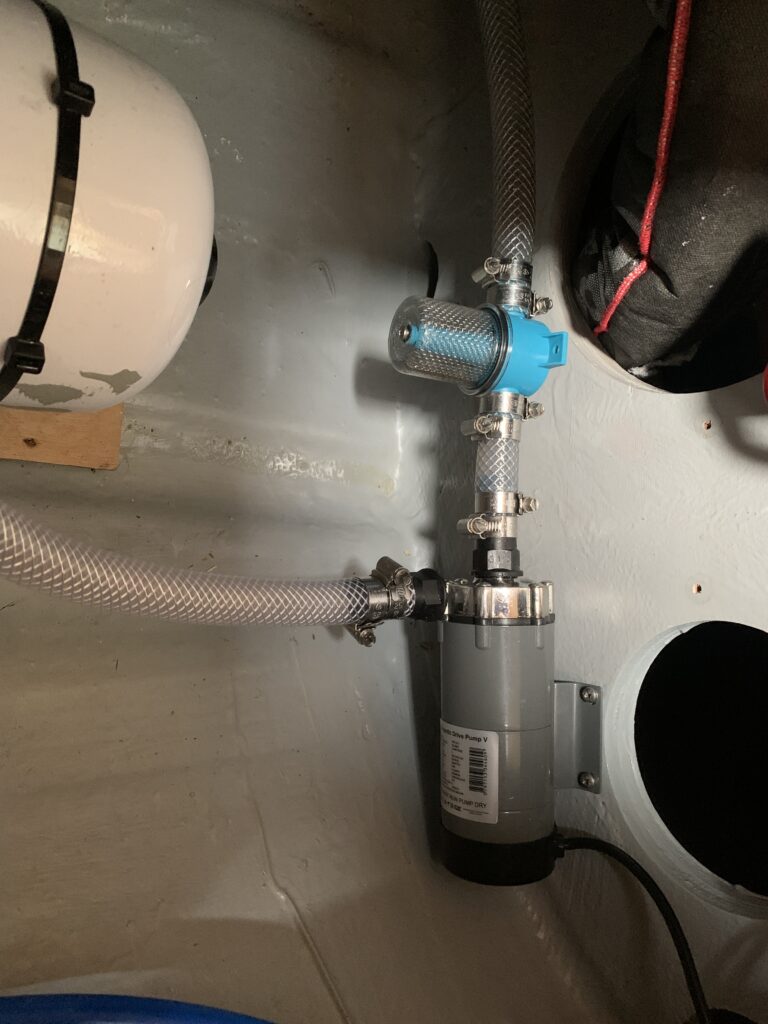
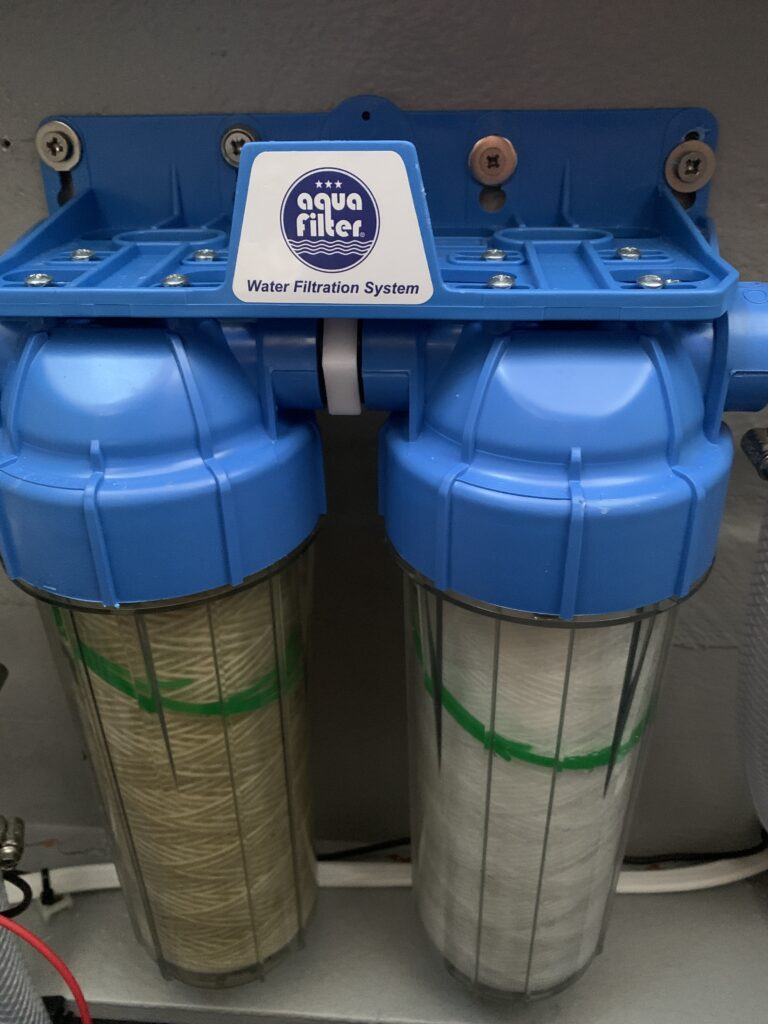
The water hose then runs from the pump under the floor to the forward cabin in the space under the bunk. There was actually quite a bit of space there, so there weren’t any issues with routing things. Next it was through a non-return value. This was necessary for the flushing to ensure that any fresh water wasn’t pushed back out to sea. After this there is a flush solenoid (more on that later) and then onto the filters. Here it’s a standard 50 micron and 5 micron filter which are used to ensure that the water getting to the membrane is as clean as possible. The final hop is from the filters to the high pressure pump.
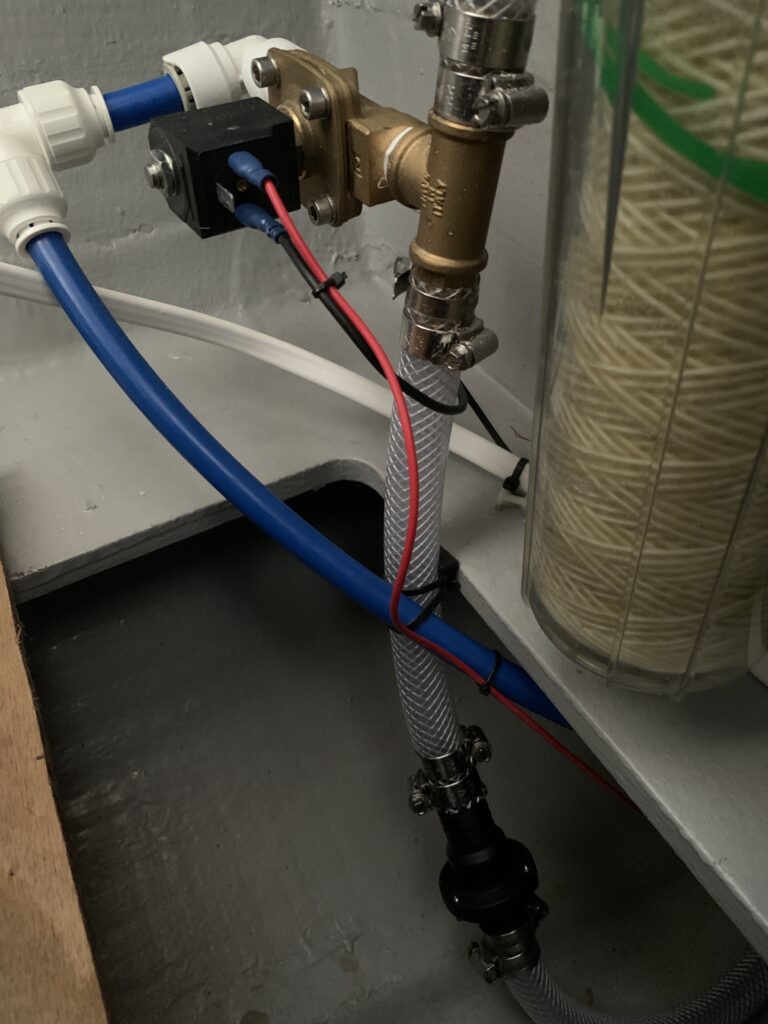
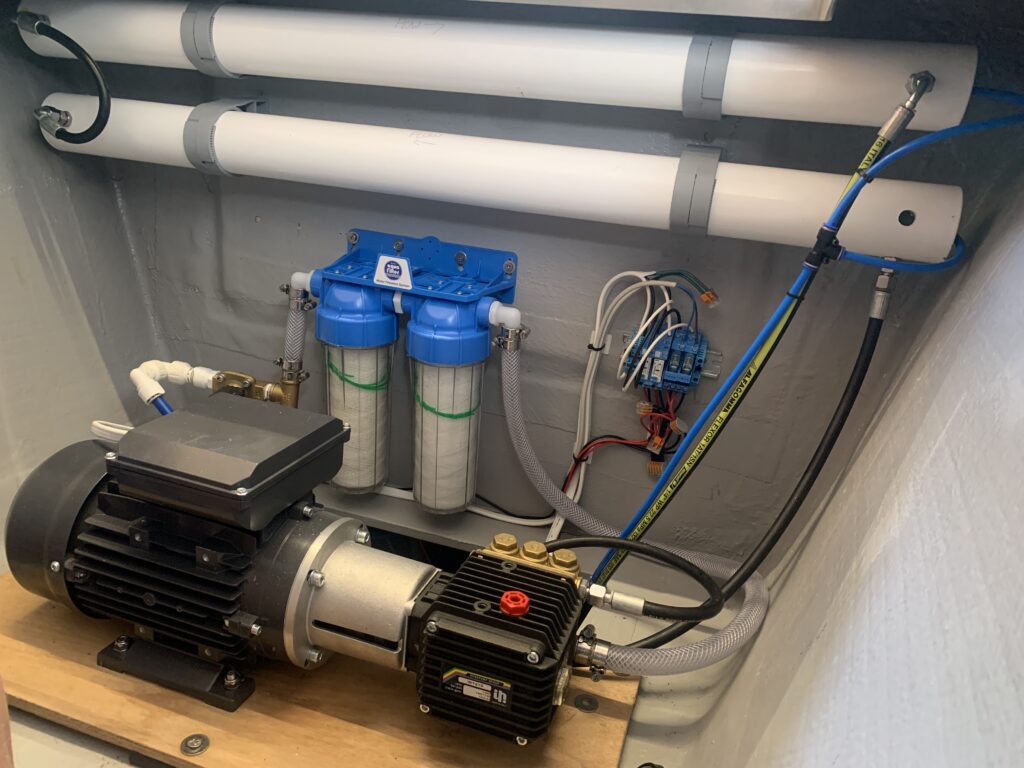
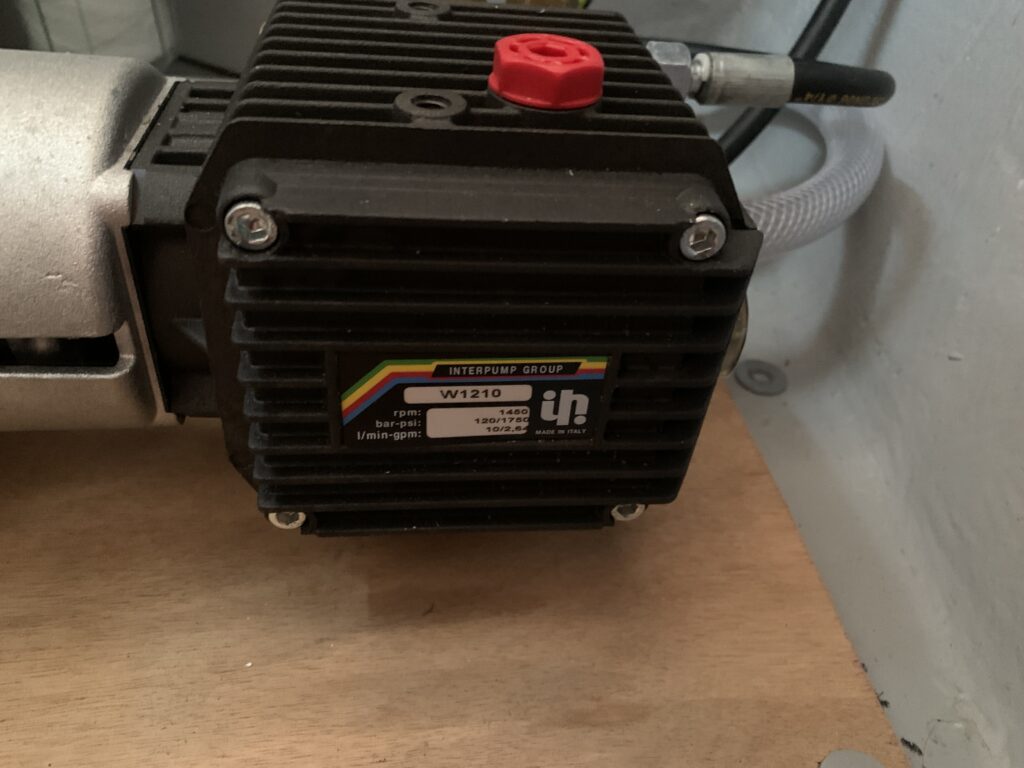
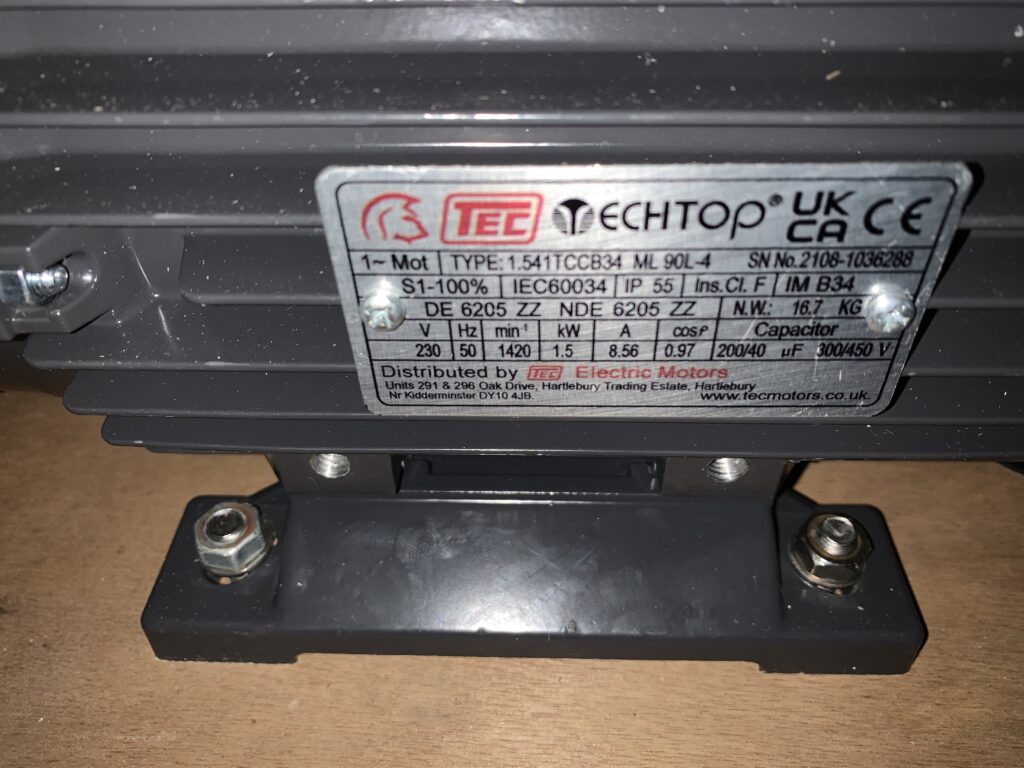
This is where the magic happens and everything else is a support act. The pump is a 1.5Kw single phase unit that packs a punch at 1.5 horse power. It has a soft start capacitor in it, which is important then running on an inverter to ensure you don’t create a massive spike in current when the thing starts. It is mated to an Interpump W1210 high pressure piston pump that can output seriously high pressures (over 1200 PSI!!).
As this can be quite a noisy setup, I mounted the HP pump on a marine ply board with a rubber insulating layer under it to try to reduce the amount of vibration and noise being passed to the hull.
Next up, it’s a high pressure hose up to the two membranes. These are 40″ housings from sailfish marine and we managed source units where the high pressure fitting goes in through the side, rather than the end. This means they take up less space and can be mounted “transversely” on the bulkhead, allowing for a much tidier solution.
Again, one small, but important consideration is that the hose that goes from the pump to the first membrane has a loop in it. This is to help reduce the hydraulic shock that can be created by the pump pushing the water so hard. The loop allows for a little space for things to expand as the pipe moves about.
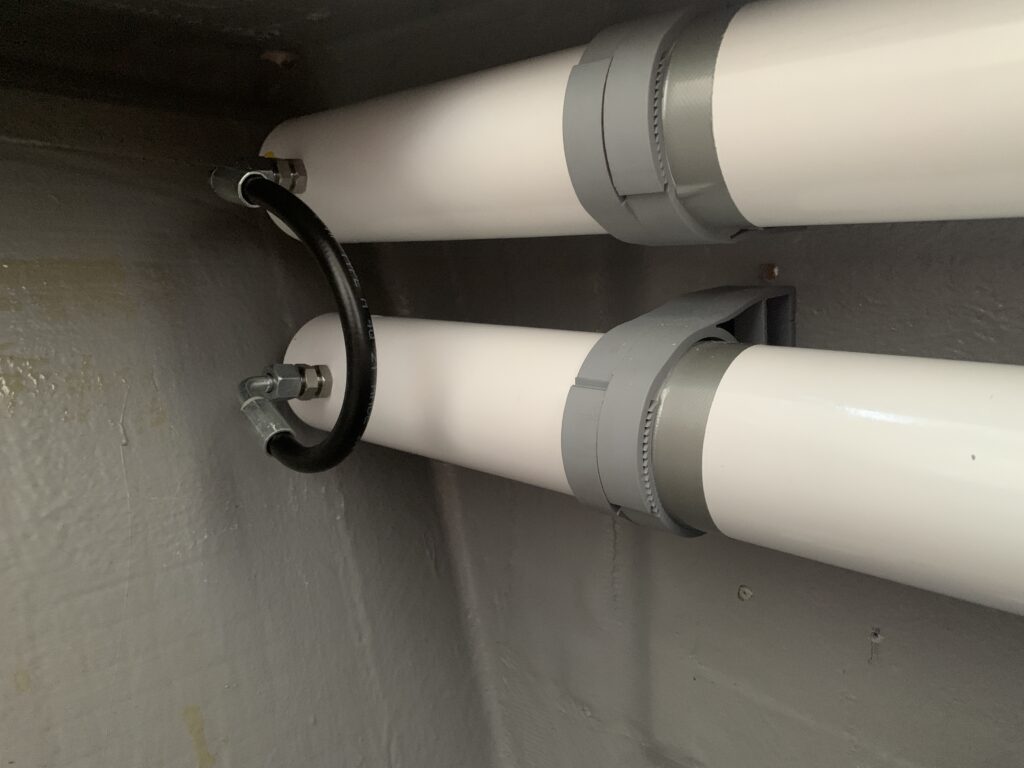
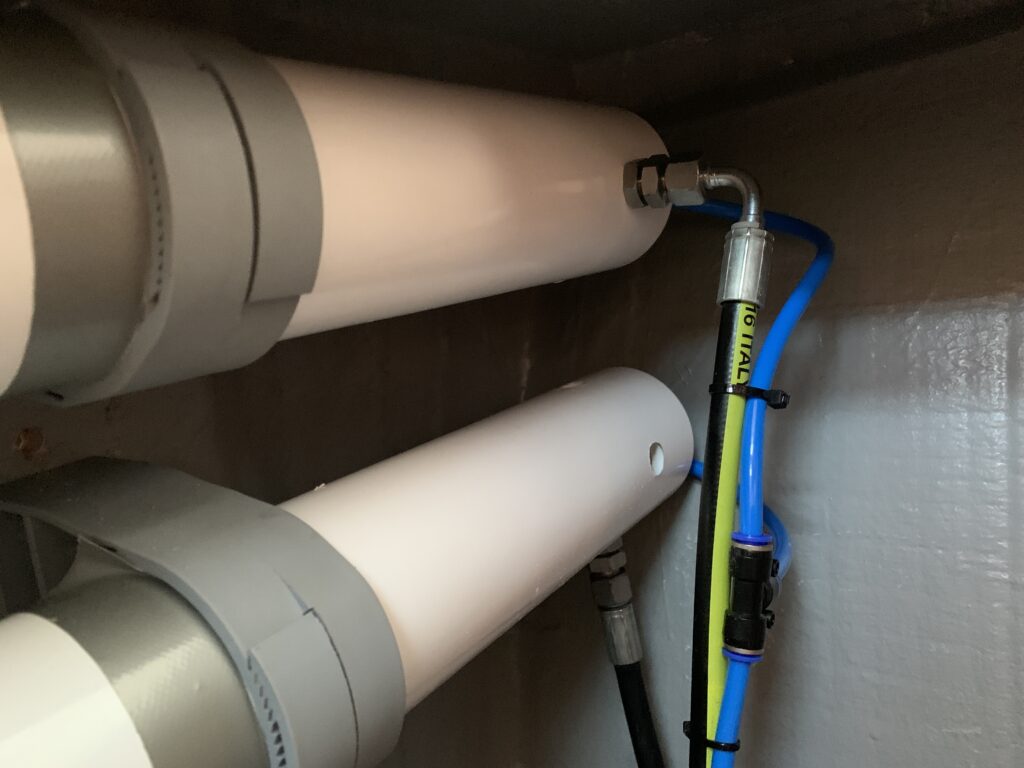
The housing and the membranes are plumbed up series, with water passing through one and then through the second. From there there is a high pressure line that goes to the control panel and the pressure control system.
Product water comes out from either end of the membrane. I have them both coming out next to each other and then a T-piece to join them together. From here the product water goes to the control panel to where it can be routed to the right place.
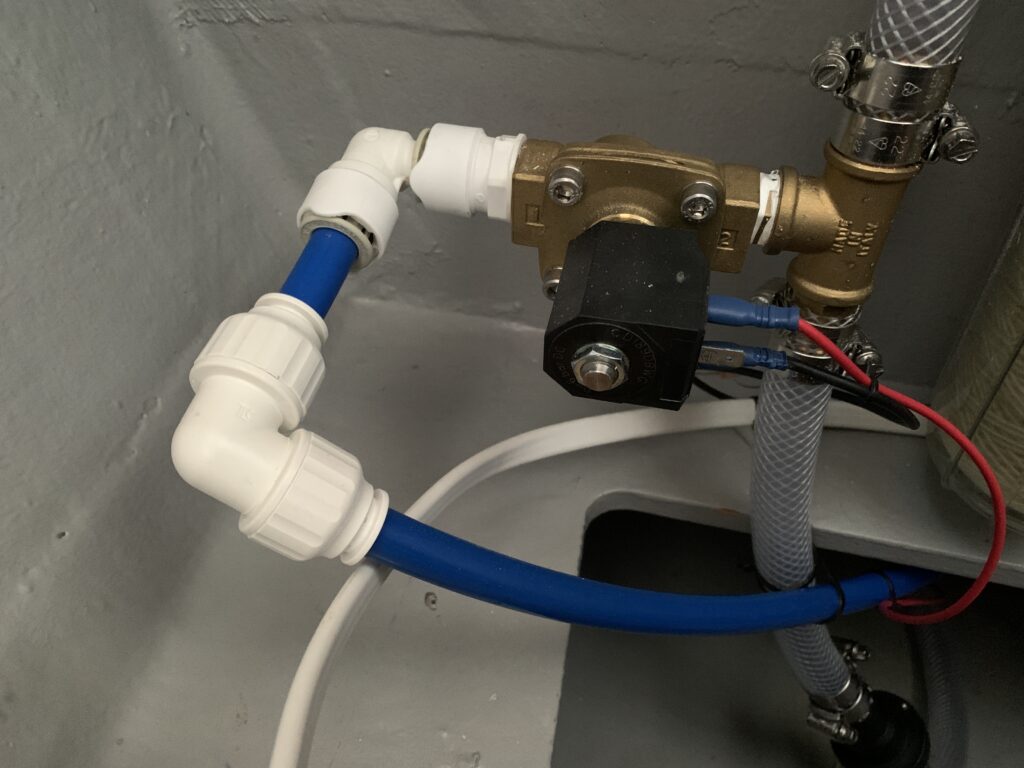
we are using the water maker all the time, so are only planning on flushing it once a week. However, I wanted to create a semi automated flushing system that was easy to control. It’s pretty simpel really, I took a connection from our house fresh water system, put it through a non-return value and ran it up to a 12V 15mm solenoid value. When you want to flush, you active the value and the normal fresh water pump pushes fresh water through the system.
One thing to note is that when you fresh flush, you have to ensure there is no clorine in the water as this can cause serious damage to the membranes. In lots of systems, you will see an in-line charcoal filter to take out any clorine that comes from shore water. However, we very rarely fill up from shore water now and if we do, we put it througha charcoal filter before it goes in the tanks, so I didn’t need the extra filter here
For me it was really important to have easy access to a control panel for managing the water AND for it to not look completely home made. I’d already identified that I wanted the controls in the cupboard where the fresh water stopcocks are.
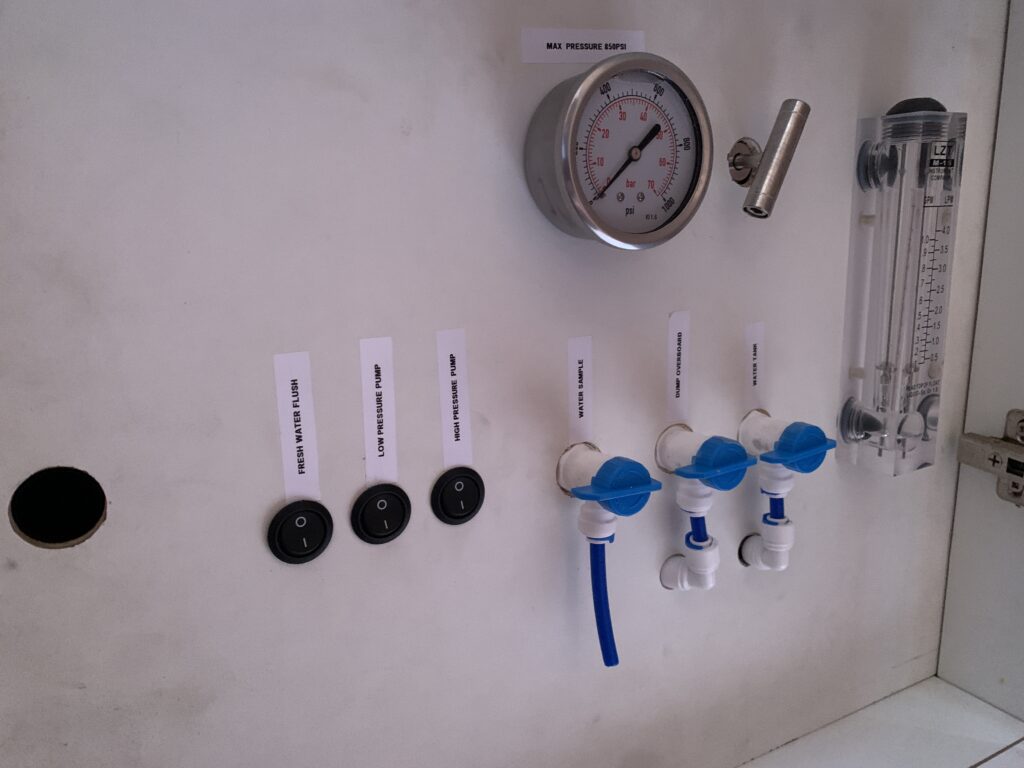
Again, the setup is pretty simple.
The high pressure hose comes from the membrane, through the pressure gauge and through the needle valve. Once the pumps are running, you tighten the valve, increasing the pressure behind it. this forces the water through the membranes, creating the fresh product water. The salty water than then goes through the valve is then dumped over the side.
Next is a system for managing the product water. When you start the water maker, it can take a couple of minutes for the production to settle down and to be producing top quality water, Because of this, I created a simple manifold with 6mm water taps. When you start-up, it’s set to “dump” the product water. I found the best place to send this was into the grey water tank, where it then gets pumped over the side. I then have a connection for sampling the water to check the Total Dissolved Solids (TDS) are at the right level. Once we’re below 200ppm, you can open the valve to send water to the tank and close the others. It’s all pretty manual, but gives you complete control. The flow meter sits inline and allows you to see how much water is being produced (150L per hour at the moment).
The system runs at a maximum PSI of 850, although at the moment i’m running it at 800 as things settle down.
The final part is the electronics. You have to be careful here as you’re dealing with some high 240V current, which can be dangerous.
A couple of key design considerations for me were that:
This meant I needed to build the system using relays which allows the circuits to be switched on / off remotely.
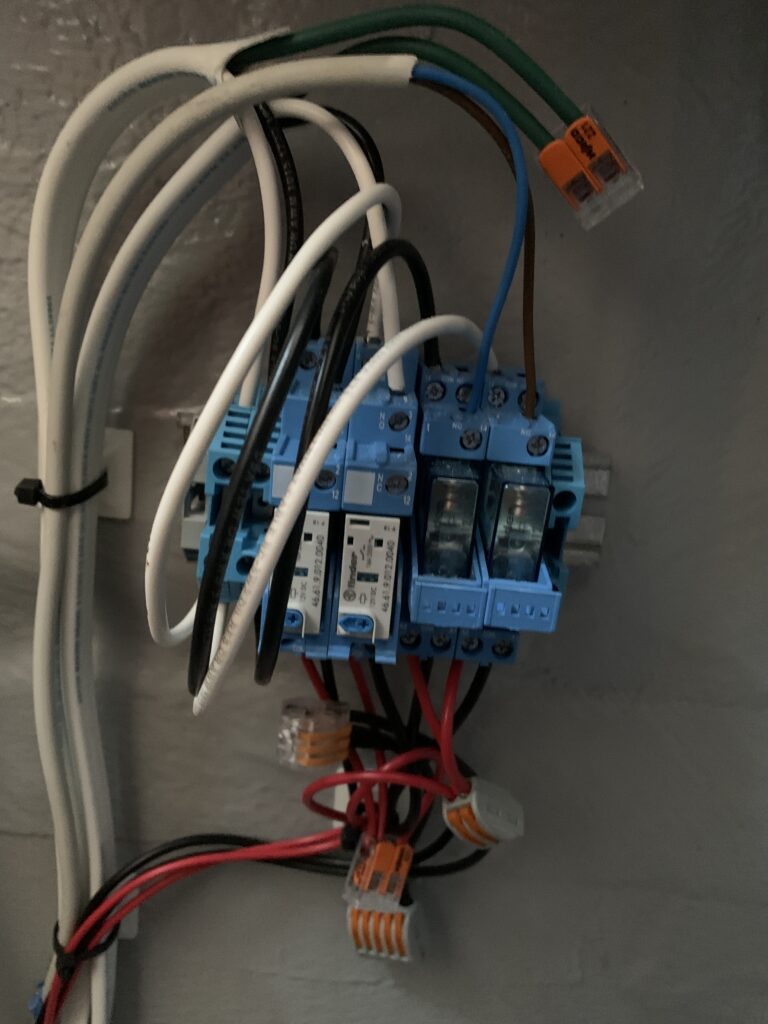
As always, i’ve tried to keep things simple.
Firstly there is a 12V feed (fused to 2A) that goes to the three switches on the control panel.
“Flush” just goes to the solenoid and will open it when the circuit is closed.
For the 240V system, there is a feed from the consumer unit that is fused at 16 Amps (both poles). This then runs to a small busbar in the compartment, Here there 4 relays, 2 for each pump (one for positive and one for negative). This ensure that both poles are switched on or off, creating further redundancy. When then 12V switch is closed on the control panel, closes the two assoicated relays and the pump turns on.
Ok, it’s still early days, but i’m very happy with how things turned out. The install fitted into Nautilus really well and I don’t think it looks too DIY!!.. Production is a steady 150L per hour, which means we can fill the boat from empty in 3 hours. At full whack, both pumps are pulling around 1.4Kw, which is a lot, but well within what Nautilus can provide. At that power consumption, we’re looking at around 9 watts per litre of fresh water. Ok, a Shenker will do the same in around 5 to 6 watts per litre, but will cost you a small fortune. If I need to, i’ll add another solar panel or two to make up the difference 🙂
Future upgrades:
1 – I want to put in a real-time TDS meter to be continually monitoring the quality of the water. Also to keep a track of the number of house on the water maker
2 – I want to automate the fresh water flush function, just so it runs for the right length of time and turns off automatically.
So that’s…. another project off the list.
Pre start
To Start
all done, keep an eye on the tank levels
To Stop
all done – if you need to flush (around once per week or if we’re not planning on making water for a while)
To Flush