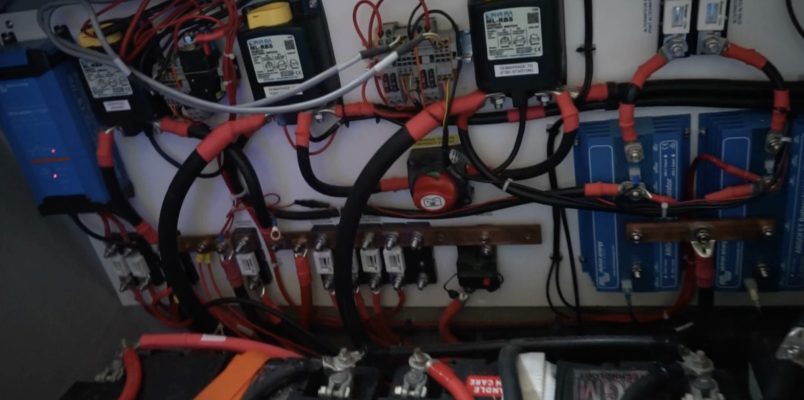
I love poking around in the boat to understand how it all works. One of the things that certainly had a “wow” factor when coming aboard was all the wiring that Nautilus has. Getting to grips with it has been thoroughly enjoyable and I’ve needed to do it to so I can start planning our upgrades to live off-grid.
In this blog post, I thought i’d share what we have today on the boat.
So how to make sense of all of this spaghetti........
First off – it’s a case of documenting what are the big boxes we have on Nautilus:
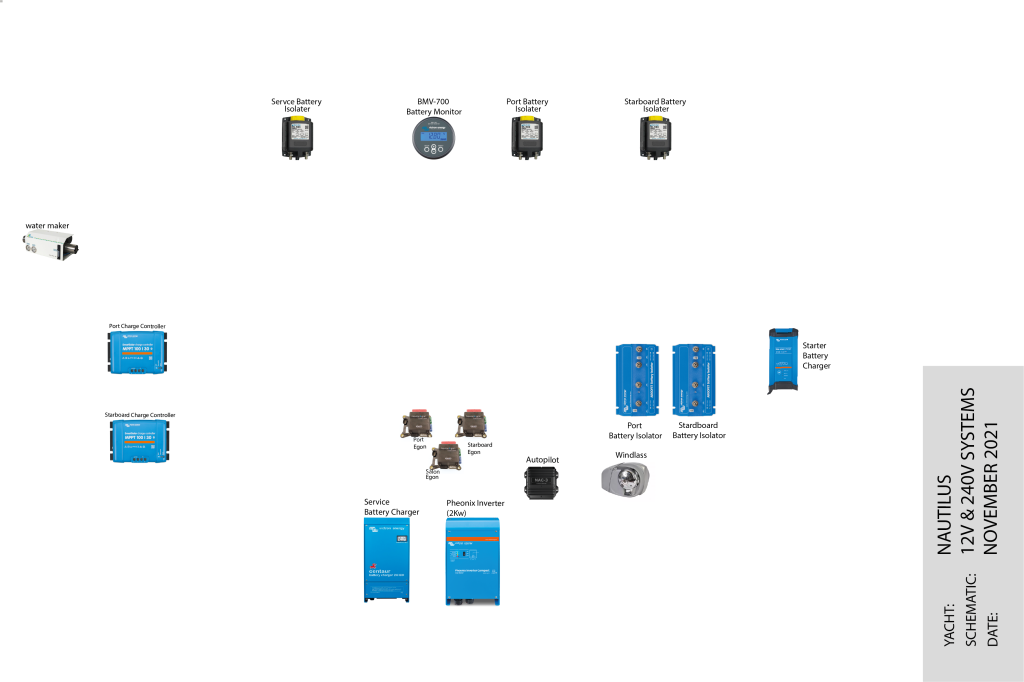
In here we have:
- A watermaker – good, but not big enough for our needs.
- Battery charger for when we’re plugged in ashore
- Inverter – that lets us run regular mains-powered devices whilst at sea
- Windlass – for pulling up the anchor
- Autopilot – as we’re can’t be steering manually all the time
- Battery Isolators & Egon are all for switching things on and off
- Battery Monitor – so we can track how much power we have stored and are using.
- Solar Charge Controller – a clever bit of kit that lets us connect in our solar panels.
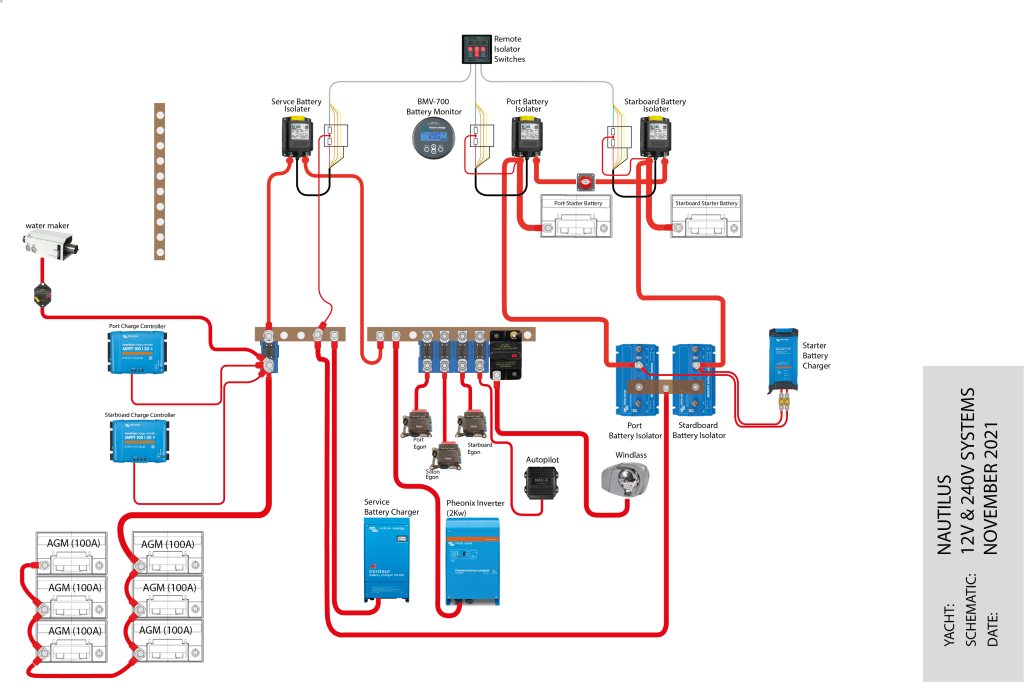
Here you can see that we have different banks of batteries. Each engine has its own battery for starting it and then we have the “service bank” that we run all our electronics off. These also have their own chargers too to keep things separate.
Next, it’s time to add in the other sources of charge. This is the alternator on the engine and the solar panels.
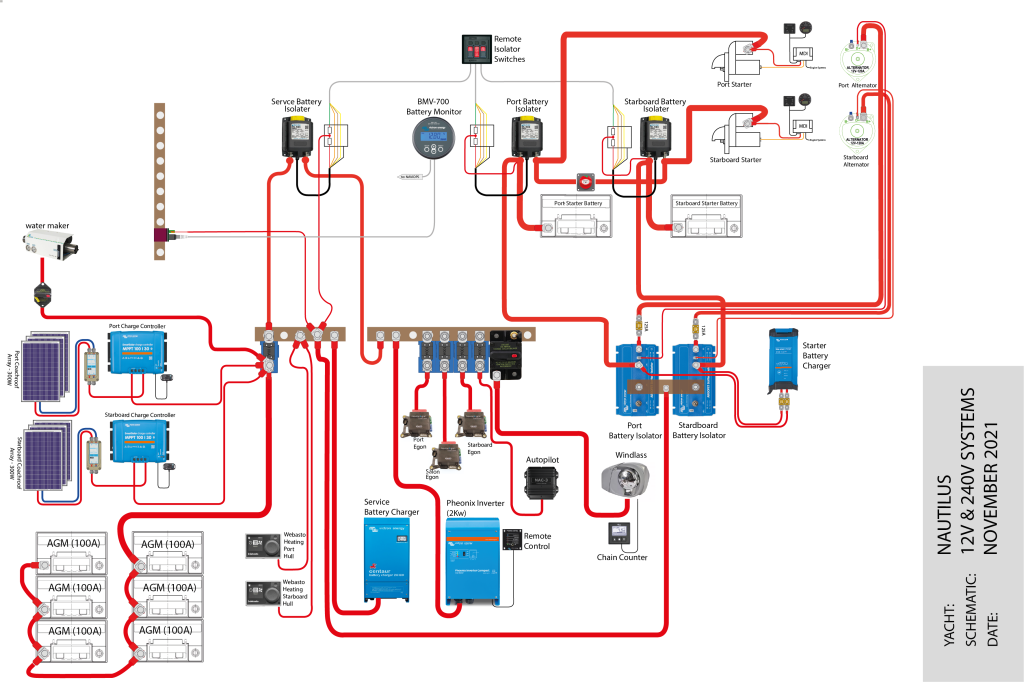
It’s at this point you start to get a feeling for how complicated things are…. Also, given we are a catamaran, then there is a lot of duplication, with two engines, two alternators, etc…. great for redundancy, but lots of wires.
At this point, I was trying to track down random wires that I didn’t know what they did – I did realise that i’d missed of the heating system we have aboard, so that accounted for two of the red leads that were kicking around.
Are we getting close to complete? – NOPE – we now need to add in the shore power / 240 volt system that we use for all of our regular electronics.
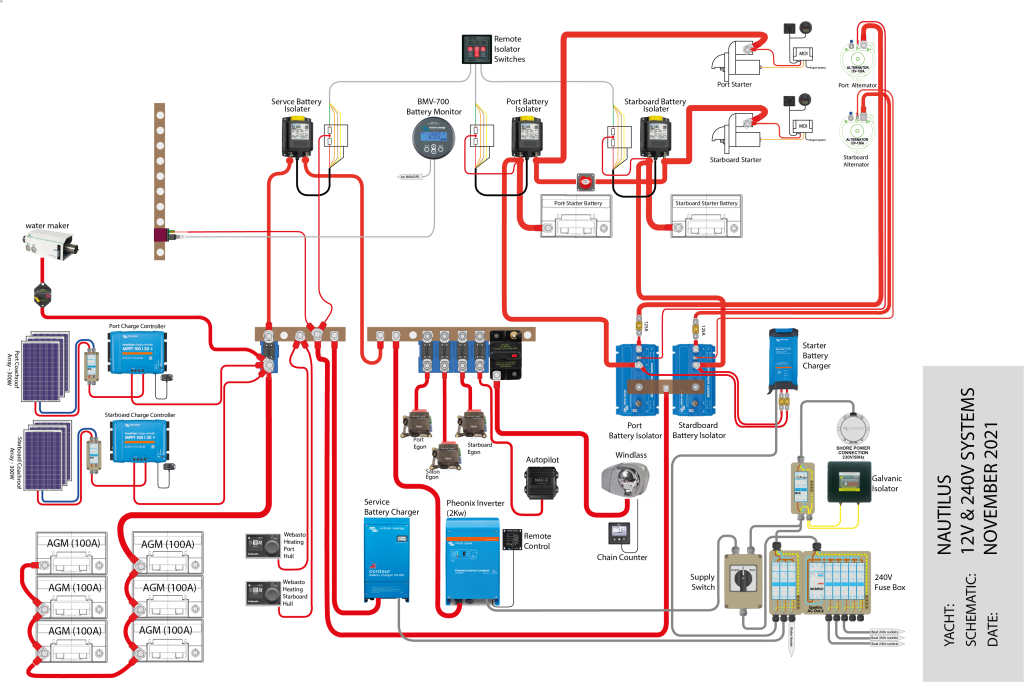
And Finally....
The last stage of the puzzle is to connect up the negative wires (these are the ground wires that as usually black, but the standard seems to be to draw them in blue). Fortunately they all run back to the same place, but it’s just a case of fitting a lot of wiggly lines into the diagram.
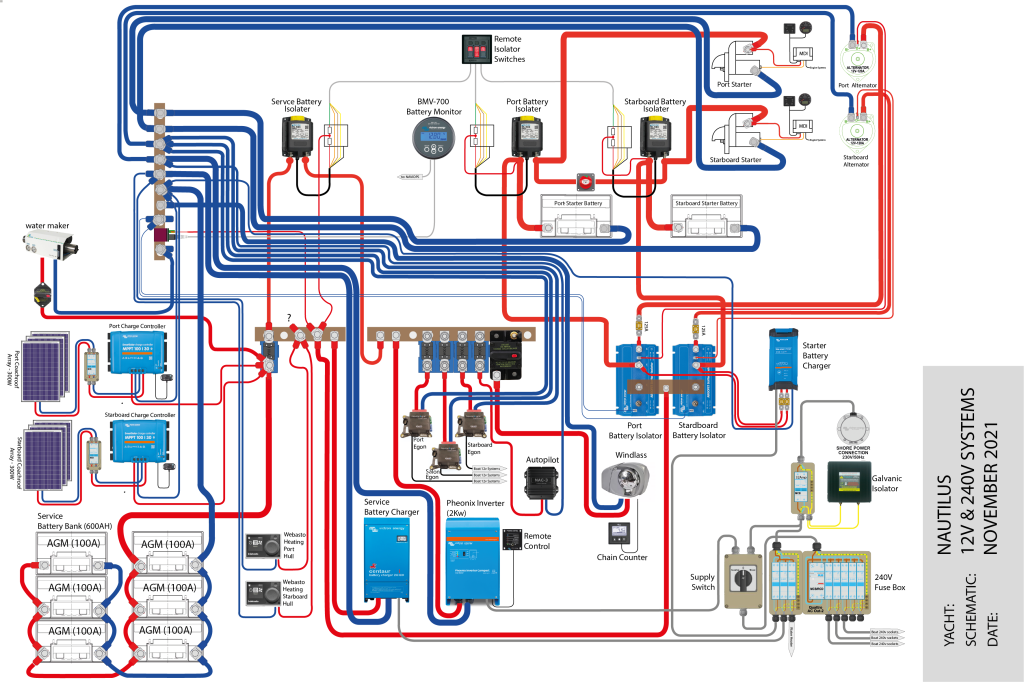
And that’s it… This is Nautilus’ core wiring that lives below the bunk in the owners cabin! and this is only the beginning of the story as I can now start designing the new system for us. However there are a few things to call out…..
– The water maker and the webasto heating are wired up in the wrong place – they should really be the other side of the isolator switch, but that’s an easy fix.
– There is a random wire that I still have not been able to trace what it does. I’ve even unplugged the bloody thing and nothing has stopped working on the boat – that’s very strange, but i’m sure i’ll find the answer soon.
– This doesn’t touch any of the wiring for the navigation systems, instruments, etc. I’m having a break and will document those in the future.
So what’s next then?
I’m going to purchase a monitoring system that will be the “brains” of our electronics. When that comes i’ll plug it in and start tracking all our usage.

